 I recently started playing with OpenLDAP and as a consequence went on the search for a LDAP client. I had been using the Softerra LDAP browser several years ago and it seemed to do what I want but I now see the free version is somewhat limited so I went looking.
I found the Apache Directory projects “Apache DS”, the LDAP server component and the “Apache Directory Studio” the LDAP administrator/browser tool. Directory studio utilizes the Eclipse framework, so if you are used to using Eclipse that will help.
In reality I found the Apache DS to be a pain to get working under Windows and found that OpenLDAP for Windows from UserBooster was easy to install and worked well. However this article is not about LDAP, as such, it’s intention is a place for me to remember some of the bits about how to use the Apache Directory Studio.
I have added a post OpenLDAP for Windows which has brief description of installing OpenLDAP. Neither article is intended as a how-to for LDAP there are lots of places on the Internet with this information.
As you can tell I chose to use Apache Directory Studio as my LDAP client. Revisiting the subject I see there are quite a few LDAP clients and possibly Apache is not the best ?
Resources
OpenLDAP for Windows – Userbooster
http://userbooster.de/en/download/openldap-for-windows.aspx
I used this as my LDAP server on Windows
Apache Directory Studio
http://directory.apache.org/studio/
This site has excellent documentation and of course you can download from here.
Installation
I am not going to detail the installation of Directory Studio as it’s a simple exe you just accept the defaults and all is good. Suffice to say if you choose to use an existing JRE/JDK you must be careful that if you have a 64bit JRE/JDK then you must use the 64bit Directory Studio and equally for 32bit installs.
Once you have installed and started Directory Studio the first thing to do is close the “Welcome” pane. Then select:
Window | Open Perspective | LDAP
How-Tos
The point of this post is to give me a place to put info on using the Apache client so I can reference it later. This is driven by the fact that not everything in the current version of the Directory Studio is quite as intuitive as it might be.
Connecting to LDAP
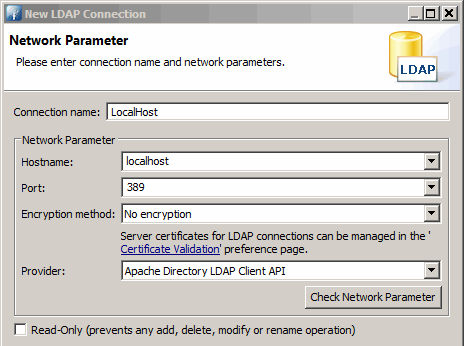
Even if you are connecting to LDAP on your local PC/Laptop you still need to configure a host name and port. Assuming you have select the “LDAP” perspective look for the “Connection” pane, probably around the bottom left of the Studio window:
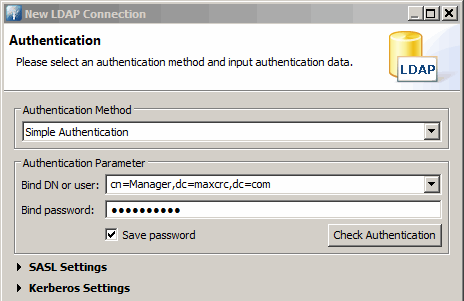
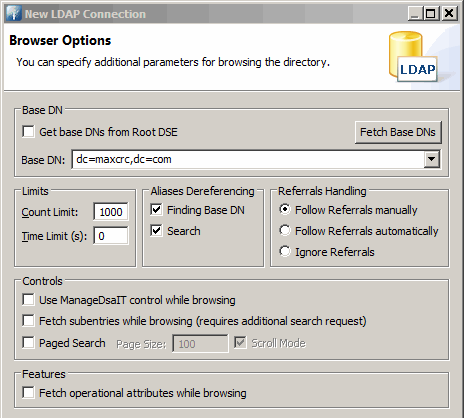
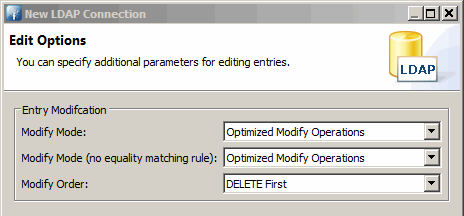
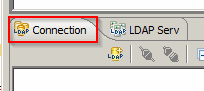 Right click the pane and create a new connection:
 |
 |
 |
 |
To open a connection simply double click on the new connection you just created.
Running an LDIF file
A *.ldif file is a list of LDAP entries which allows you to add or modify LDAP entries. You can use this to populate you repository. So it would typically look like:
# Sample domain definition
dn: dc=example,dc=com
dc: example
description: My domain description
objectClass: dcObject
objectClass: organization
o: Example, Inc.

# Organizational Unit People
dn: ou=people, dc=example,dc=com
ou: people
description: everyone in the company
objectclass: organizationalunit
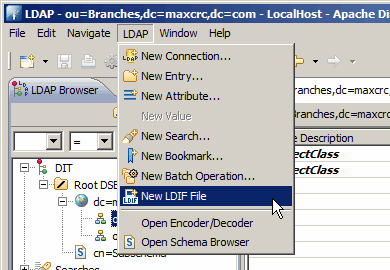
Directory Studio includes a tool to allow you to do this. There are actually a number of ways to invoke this the way I do it is to select: “LDAP | New LDIF File”.
 |
 |
Simply type the details in the LDIF window and click on the green “Play” arrow in the top right corner to run the script. This is a great way to test bits of your LDIF file that are giving you trouble.
Importing from an LDAP server
From time to time you may want to copy or clone an entry from one LDAP server to another – you may even want to copy everything. Directory studio has some tools to help you. Be warned if you are copying from dis-similar LDAP server applications you may have problem because different LDAP vendors do things differently and what works for one may not work for another in the same way.
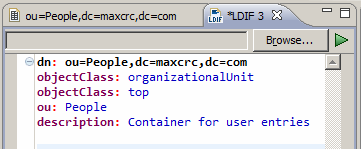
To import one object simply right click on the object and select “Advanced | Copy Entry as LDIF (all user attributes)”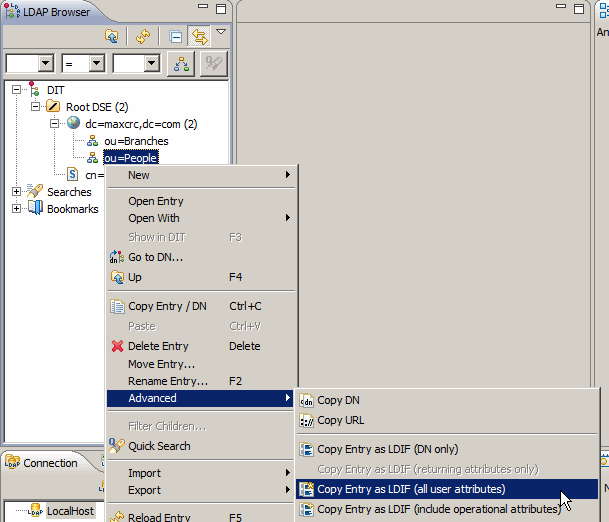 If you then paste the details into a text editor or the LDIF editor in Studio, it will be a valid LDIF entry for re-creating the entry:
dn: ou=People,dc=maxcrc,dc=com
objectClass: organizationalUnit
objectClass: top
ou: People
description: Container for user entries
If you want to get more objects at a time in the form of one long LDIF file, simply select the top most entry of the tree you want to export and right click:
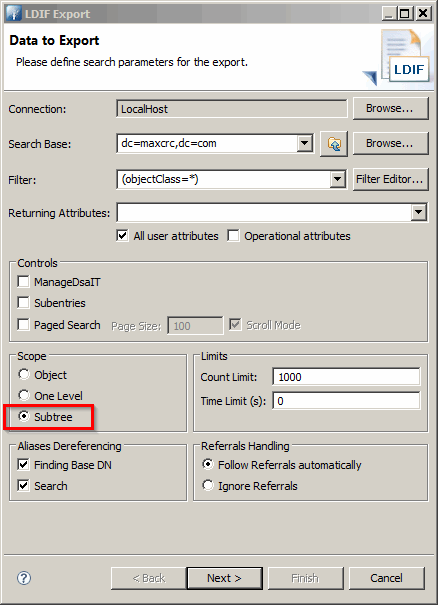
Export | LDIF Export…
You will get a dialog similar to:
 |
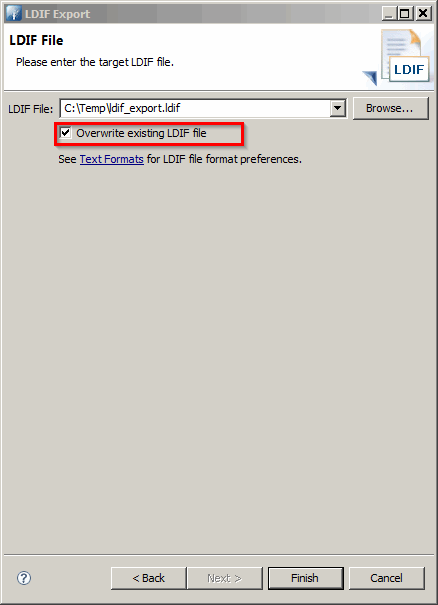 |
Be careful on the first dialog to select “Subtree” and it’s handy to select “Overwrite existing LDIF file” on the second dialog.
Getting class or attribute details
LDAP entries, such “fred.dagg” are made up of classes and attributes and classes are made up of various definition details and one or more attributes. Again this is not a lesson about LDAP there are many fine resources on the web on that topic.
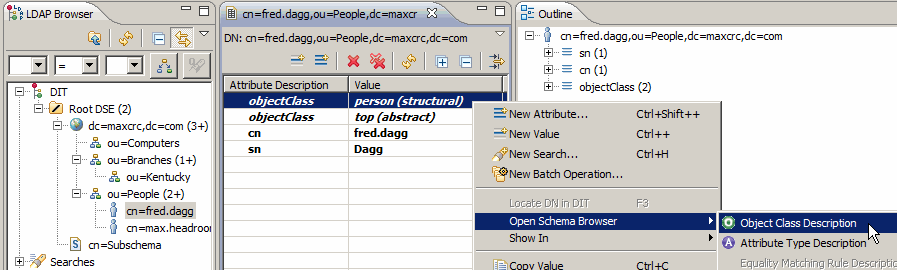
To get details of a class used by a particular entry I will give as an example the entry in my tree “fred.dagg”.
- Click on the entry “fred.dagg” to display its details in the adjoining panel.
- then right click the class you want to investigate, in our case “person (structural)” and select “Open Schema Browser | Object Class Description”:
 This will reveal the following:
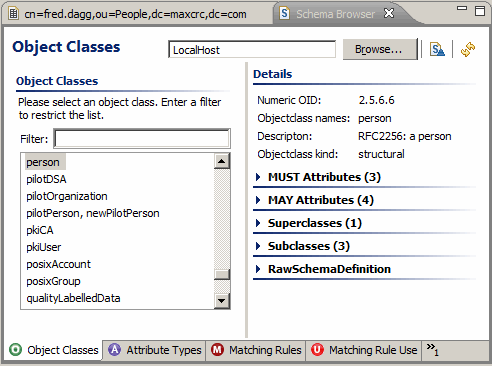
There are a number of interesting things to this panel but one thing I found particularly helpful was expanding the “RawSchemaDefinition”. This gave me the exact, as in cut and paste, text to recreate this class in OpenLDAP:
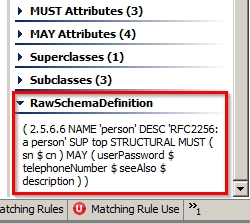
To put this into OpenLDAP simply add the text highlighted about into a schema file in the “/schema” directory of your LDAP server – you will of course have to prefix the entry with “objectClass”.
Thats it
I hope this has helped. The reason I wrote this article was so that when I came back to use Studio months later I would have a reference. Unfortunately this means if you have any question I may well not know the answer 🙂