Zoyinc
  • Home
  • Contact
  • Categories
    • CD Archiving
    • GIMP
    • Linux
    • MythTV
    • Open Media Vault
    • Technology
    • VMware
    • WordPress
    • YouTube
  • About


Clean install of Oracle 11g 64bit on Windows 7

By

Tony

,

February 24, 2013

This article is about a clean install of Oracle 11g R2 64bit on a Windows 7 64bit laptop.

This setup is focused on my typical target install which is a simple DB install that doesn’t require a sophisticated DB but does require me to have an ability to create multiple DB instances – so “Express” edition with only 1 DB instance isn’t suitable. Thus I do the “Standard Edition One” install.

Oracle has quite generous arrangements allowing people to download and instal Oracle Databases. Typically all you need to do is join OTN, Oracle Technology Network and adhere to the terms which , if I understand correctly, allow you to do developmental work with the DB. Oracle licensing is complex, if you have any doubts you should read up on licensing or contact Oracle direct – it is absolutely your responsibility to determine your licensing obligations. Any comments on this site regards licensing are exactly that “comments” and should not be taken as advise or any type.

Note all images in this article can be expanded to full size by clicking on the image!

Preparation

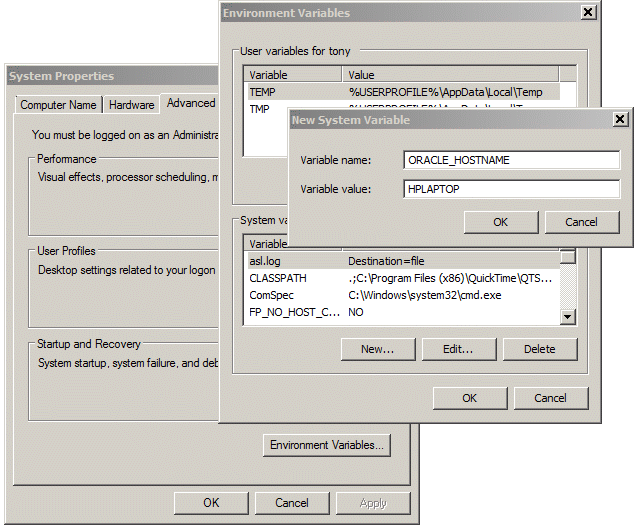
1. Create a system environment property “ORACLE_HOSTNAME” and set it to the name of your PC. Be careful to get this right as it will effect your ability to run Oracle and connect to it off the network. The easiest way to find what name your PC is using is to run “hostname” from a DOS box. Ensure you create a system property rather a user environment property: 

2. If you have previously installed an Oracle DB onto this PC ensure you have uninstalled and removed everything: 

  • Remove any database instances. It is vital you do this before uninstalling Oracle itself because if you uninstall Oracle first you won’t have an easy way to remove the databases and services.
  • Uninstall all Oracle products.
  • Remove the Oracle directories
  • Remove any Oracle directories under “C:\Program Files” or “C:\Program Files (x86)”
3. I have always done Oracle installs as an Administrator with “User Account Control Settings” wound right down (In Control Panel under “User Accounts”). So this may be necessary or may make life easier I am not sure.
4. Ensure you have a directory “C:\Oracle” as that is my install location for Oracle.
5. Download the install files for Oracle 11g R2 following from Oracle: 

  • win64_11gR2_database_1of2.zip
  • win64_11gR2_database_2of2.zip
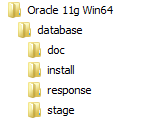
6. Put both zip files in one directory and do a right click “Extract Here” for each zip file using your favorite Zip program. They will both extract into the same directory structure to produce something like:Oracle11gInstall_2

Oracle install steps

1. Run setup by double clicking on “setup.exe” which is in the “database” directory.
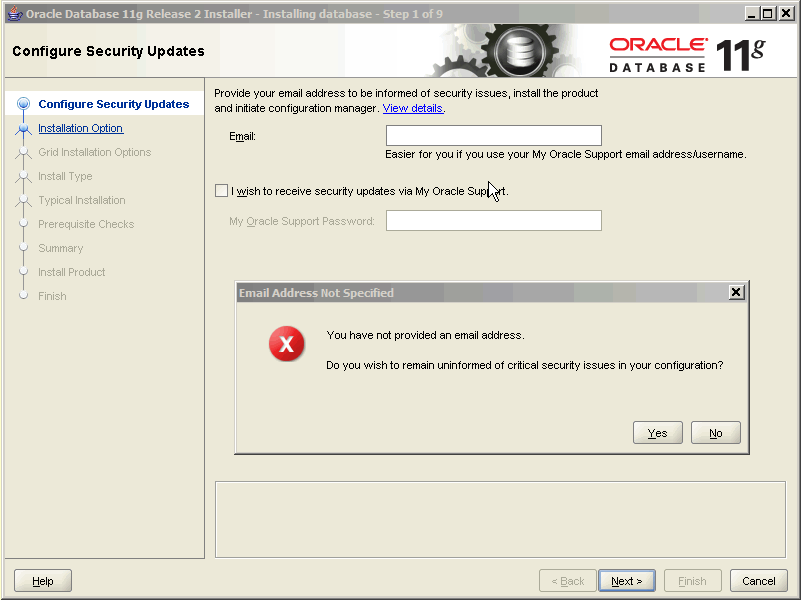
2. The first screen is “Configure Security Updates”. Its a little confusing but basically I opt of this process.When you click on “Next” to continue you get a nasty popup dialog about not getting updates during the install but for an install on a developer PC or home PC its probably not a big deal – your call but I usually skip this by deselecting “I wish to receive security updates…”:Click on “Yes” to the popup dialog to continue.
3. On the “Select Installation Option” I usually go with “Install database software only.” because this works for me. If this is your first time and you have problems it might be worth selecting “Create and configure database”, but I would first try just installing software. Then click on “Next” to continue
4. On “Grid installation options” I select the default of “Single instance database installation”. This does not mean you can only have one DB instance it just means you don’t get grid. Yes I think it is a bit confusing too.Then click on “Next” to continue.
5. On “Select Product Languages” I just accept the default of English and click on “Next” to continue.
6. On “Select Database Edition” I select “Standard Edition One” because this is the simplest option. Again click on “Next” to continue.
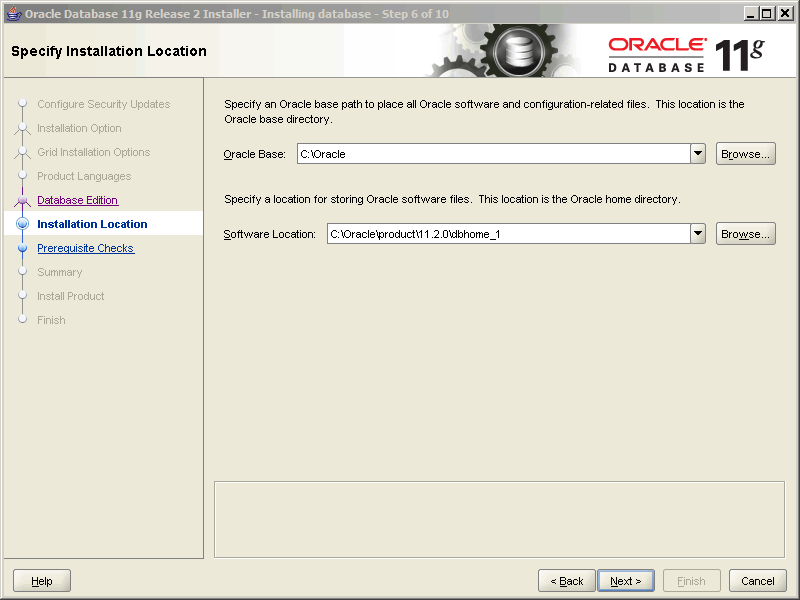
7. On “Specify Installation Location” set the “Oracle Base” to “C:\Oracle” then you will find “Software location” will change to reflect this as below:Then click on “Next” to continue
8. The install will now run some prerequisite checks to make sure you have all the appropriate versions of Windows, sufficient space and so on. 

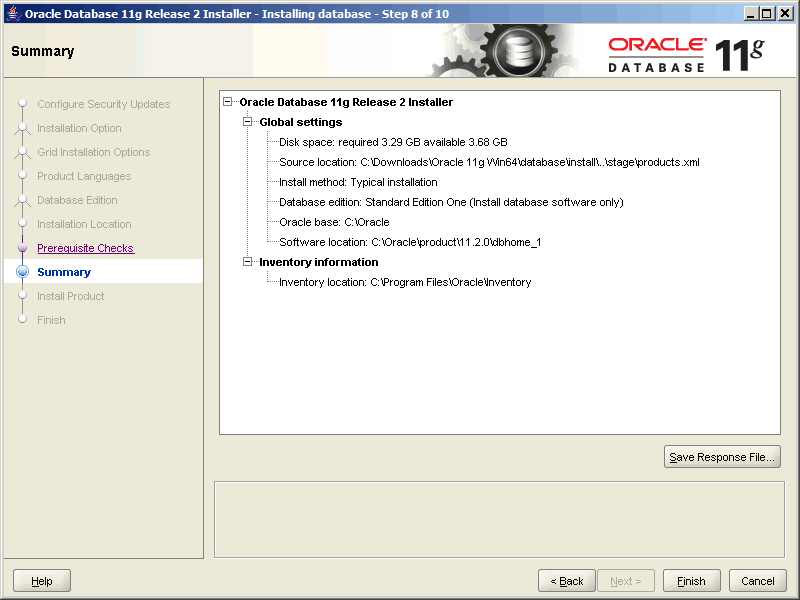
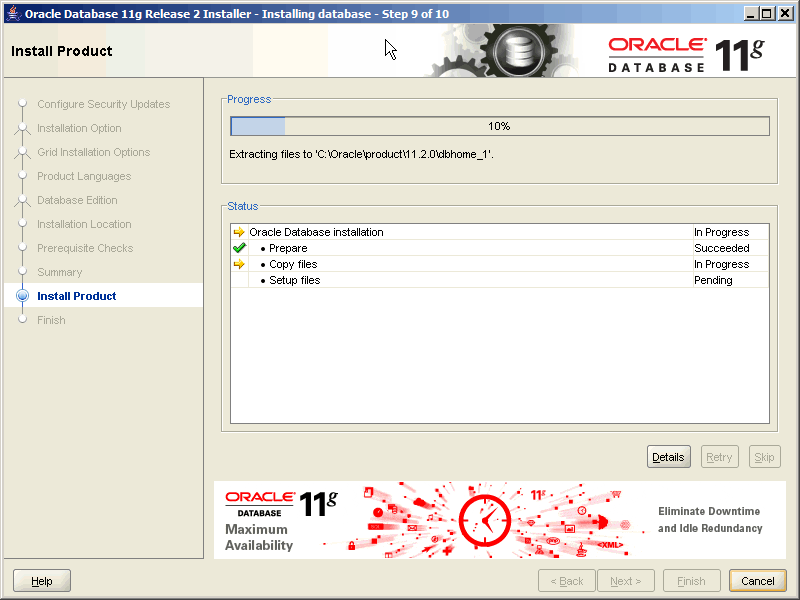
9.  Click on “Finish” to begin the install: 

Oracle11gInstall_6

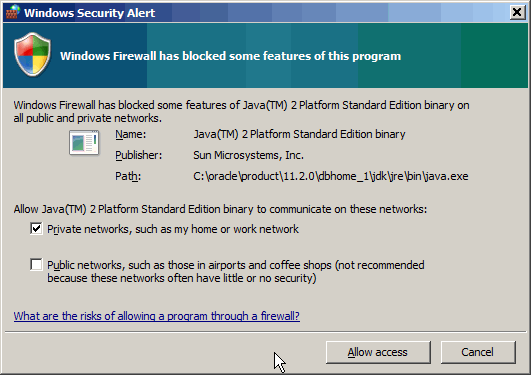
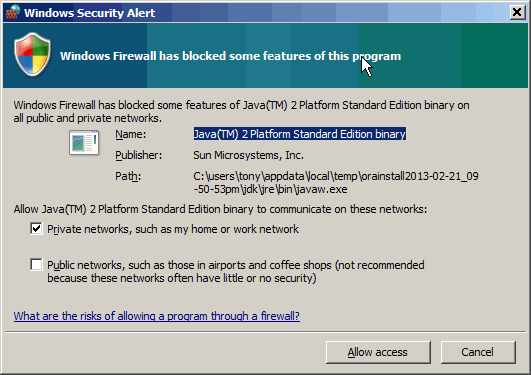
10. You may get a warning about Java and the Windows firewall blocking some features.You can click ‘Allow access” to this.
11. When you get to the “Finish” window, it will say “The installation of Oracle Database was successful.” you should click “Close” to close the installer


Post install steps

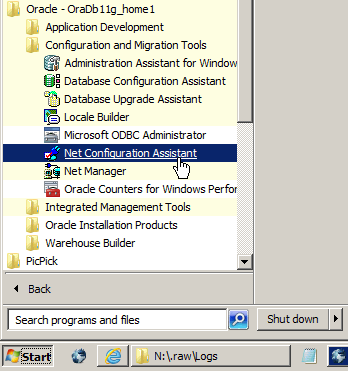
1. Install the Oracle TNS listener by running the “Net Configuration Assistant” which can be found on the “Start” menu. 

2. On “Welcome” page accept the default of “Listener” configuration and click “Next” to continue.
3. On “Listener Configuration, Listener” accept the only option of “Add” and click on “Next” to continue.
4. On “Listener Configuration, Listener Name” accept the default name of “LISTENER” and press “Next” to continue.
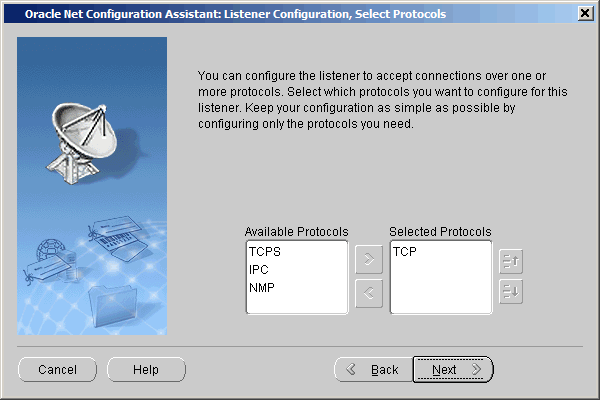
5. On “Listener Configuration, Select Protocols” accept the defaults and press “Next” to continue: 

6. On “Listener Configuration, TCP/IP Protocol” accept the default port of 1521 and click “Next” to continue.You may well get another firewall warning to which you should click “Allow access”: 

This stage can take a couple of minutes so be patient.

7. You should now arrive at “Listener Configuration, More Listeners” and you should accept the default of “No” and press “Next” to continue
8. Hopefully you will arrive at the “Listener configuration complete” page where you should click on “Continue” followed by clicking on “Finish” on the next screen.
9. If you go into “Services” under “Administration Tools” in the Control Panel you should now see a new service for the TNS listener called “OracleOraDb11g_home1TNSListener”.
10. Open up the following in a text editor: 

C:\Oracle\product\11.2.0\dbhome_1\NETWORK\ADMIN\sqlnet.ora
11. Change the line: 

SQLNET.AUTHENTICATION_SERVICES = (NTS)

To:

#SQLNET.AUTHENTICATION_SERVICES = (NTS)
12. The following directory contains templates for a variety of Oracle databases types. I always need a simple light DB and don’t need any of these templates. In fact I think they only confuse things so I would strongly suggest you move them into a new sub-directory called something like “OOTB” – that way they won’t show up when you create DBs. 

C:\Oracle\product\11.2.0\dbhome_1\assistants\dbca\templates
13. I have created a simple light DB template which you can use instead of the default ones. It is currently at version 1 so use with care: Zoyinc_Ora_DB_11g_Template_Version_2.zipNote the above template file is zipped so you will need to unzip it before putting in the templates directory.

All done and ready to go. Now you just need to create a database which is described in the article Creating an Oracle 11g database

Related

Creating an Oracle 11g database
YankIt – Extract from Oracle using JDBC including blobs
OpenLDAP for Windows
Setting up a Windows shared drive
Recent

  • AlmaLinux GUI – no taskbar or application shortcuts

    AlmaLinux GUI – no taskbar or application shortcuts

  • AlmaLinux 9.5 base VM

    AlmaLinux 9.5 base VM

  • Reset Kodi thumbnails

    Reset Kodi thumbnails

  • Set default settings values in Kodi skins

    Set default settings values in Kodi skins

  • Add/Remove/Reset music/video libraries in Kodi

    Add/Remove/Reset music/video libraries in Kodi

  • Zoyinc Kodi skin on Sony TV

    Zoyinc Kodi skin on Sony TV

  • [L] – WordPress UAM Locked Post

    [L] – WordPress UAM Locked Post

  • Import Pictures and Videos – images not previewed

    Import Pictures and Videos – images not previewed

  • Find My Train

    Find My Train

  • WordPress style name not visible

    WordPress style name not visible

About Zoyinc

  • Contact Us
  • Zoyinc Disclaimer
  • Google Search Console
  • Privacy Policy
  • Site Statistics
  • Login

Apache Auckland Backup CD CentOS Centos7 Children Configuration Debian Error ESX ESXi Fedora Firewall Install Josh Kids Kodi Linux MariaDB MySQL MythTV New Zealand OKD OMV Open Media Vault OpenShift PHP Player Python RAID RedHat Red Hat Rip School Setup SMB SonicWALL Spark tags Train Trains VLAN VM VMware Weaver Windows WordPress YouTube

Powered by

This site is licensed under a Creative Commons Attribution 4.0 International License.