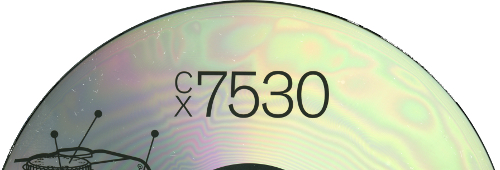
Looking at a CD which only has only writing or an image but no background color you will be able to straight through to the reflective back of the CD. Thus if you hold the CD at just the right angle to the light you will see a rainbow pattern.
The problem is if you are trying to scan a CD using a scanner you will often see this effect though often not as strong. So it may look like the above.
This presents a number of problems. Firstly you have an undesirable colored pattern to you CD and also it is often darkened and not the clean image you want – as above.
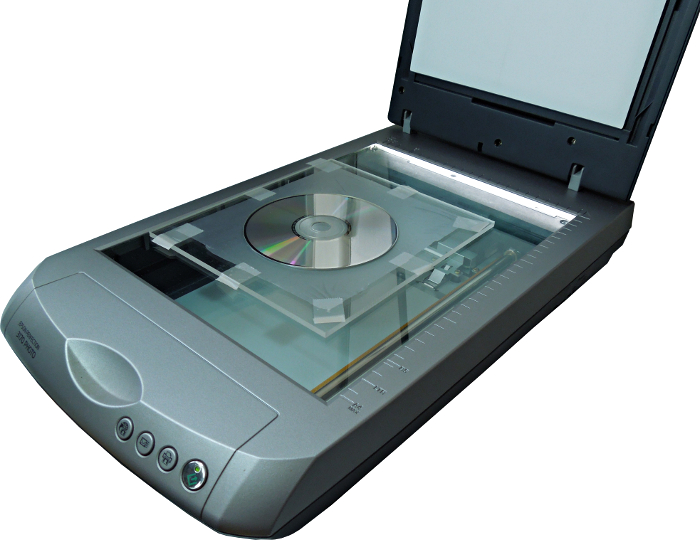
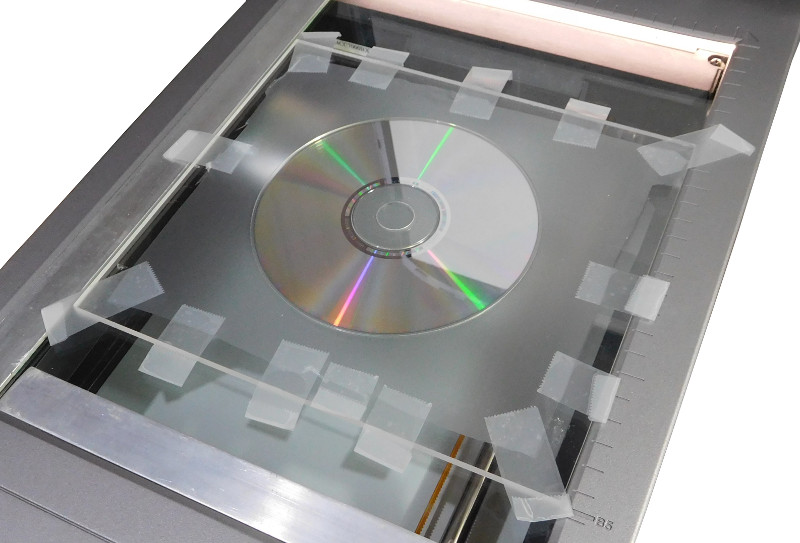
My solution to this has been to get a large piece of perspex, mine is 15 x 20 cm and 4mm thick. On top of this I place a thin diffusive film. So it looks like:
From my experience the trick is to find a film which which strikes the right balance between cuttings back the interference and retaining the authenticity of the scan. So ifs no good if there is no interference but you can hardly see the image it is so blurred.
Most likely you will have to experiment with the different things that are available to you.
I have found supermarket bags are pretty good, I get clean ones that I get from the checkout but don’t put anything in and then cut them up and stretch then evenly on the perspex. I have also seen a suggestion of “diffusing plastic intended for film and photography lighting” but I don’t know where to get this.
It is important to stretch the plastic to remove any lines, this is why I have pieces of sellotape with the ends folded over so it can be moved easily. It has become clear that having lots of pieces of sellotape around the edges makes a real difference to how smooth the film is:
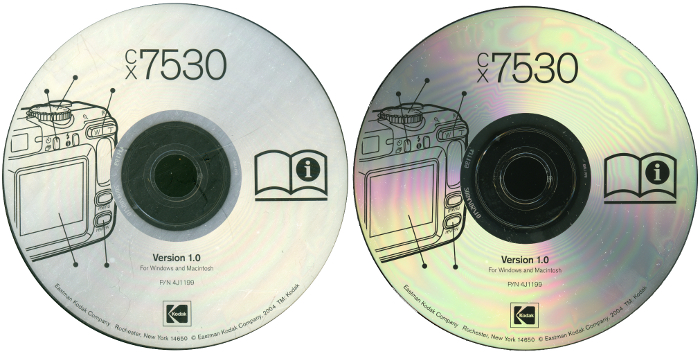
The results are not perfect, it depends a lot of the actual CD you are scanning:
Replace the film on a regular basis
The thin film you place on the perspex will get damaged over time so you need to be vigilant and replace it otherwise you will see things like the below scratches: