I have a problem, I have a 3TB drive which has all my data on it but I need to move to a new RAID solution using Open Media Vault, OMV.
I want to set up a mirrored, RAID1, 3TB array so will need two 3TB drives. I plan to use my current 3TB drive as half of the array. I could just buy two new 3TB disks but I can’t afford to do this.
The plan is to create a mirrored array with just one disk, then copy my data from my old disk to my new one. Then wipe my old drive and add it to the array.
This post is about how to create a mirrored RAID1 array in Open Media Vault but with only one disk. OMV doesn’t allow you to do this as it won’t allow you to create a RAID1 array with just one disk.
Steps:
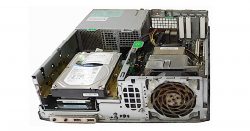
| 1. | To begin with run OMV with only the system disk attached. |
| 2. | SSH to your OMV server as root. |
| 3. | Edit the mdadm config file, /etc/mdadm/mdadm.conf which should look like:
# mdadm.conf
#
# Please refer to mdadm.conf(5) for information about this file.
#

# by default, scan all partitions (/proc/partitions) for MD superblocks.
# alternatively, specify devices to scan, using wildcards if desired.
# Note, if no DEVICE line is present, then "DEVICE partitions" is assumed.
# To avoid the auto-assembly of RAID devices a pattern that CAN'T match is
# used if no RAID devices are configured.
DEVICE partitions

# auto-create devices with Debian standard permissions
CREATE owner=root group=disk mode=0660 auto=yes

# automatically tag new arrays as belonging to the local system
HOMEHOST <system>

# definitions of existing MD arrays
ARRAY /dev/md0 metadata=1.2 name=nas2:RAID1Mirror UUID=a77b4c17:6ddd1afc:58bf7cdd:a51275ef

# instruct the monitoring daemon where to send mail alerts
MAILADDR tony@cantabrian.co.nz
MAILFROM root
If you see any lines that look like: ARRAY /dev/md0 metadata=1.2 name=nas2:RAID1Mirror UUID=a77b4c17:6ddd1afc:58bf7cdd:a51275ef Then you need to comment them out. The main issue seems to be if you create a new disk that clashes with an existing one around the device details, in this case “/dev/md0”. In my situation I am only having one RAID array on the box so it’s simple I don’t need any other array definitions. If you have multiple arrays you might want to play around a bit or do some Googling. |
| 4. | Now boot from a Debian Live USB disk, you can see how to create on in the post Create a Debian Live USB flash drive |
| 5. | If you are considering installing mdadm, please don’t do it just yet. That will come later. |
| 6. | Run lsblk to work out which drive is the RAID one:
root@debian:~# lsblk
NAME   MAJ:MIN RM  SIZE RO TYPE MOUNTPOINT
sda      8:0    0  2.7T  0 disk
sdb      8:16   1  7.5G  0 disk
└─sdb1   8:17   1  1.2G  0 part /lib/live/mount/medium
loop0    7:0    0  1.1G  1 loop /lib/live/mount/rootfs/filesystem.squashfs
From this you can see the new disk is sda – by looking at the size, 2.7 TB and also that sdb is mounted as “/lib/live/mount/medium” |
| 7. | Now we wipe the old disk just to make sure it is nice and clean, this is why it is good to remove the other disks:
First run: sgdisk --zap /dev/sda Then run “gdisk /dev/sda” and enter “x” at the first prompt followed by “z”. Finally when prompted “Blank out MBR” also enter “y”. This should all look like: root@debian:~# gdisk /dev/sda GPT fdisk (gdisk) version 0.8.10 Partition table scan: MBR: not present BSD: not present APM: not present GPT: not present Creating new GPT entries. Command (? for help): x Expert command (? for help): z About to wipe out GPT on /dev/sda. Proceed? (Y/N): y GPT data structures destroyed! You may now partition the disk using fdisk or other utilities. Blank out MBR? (Y/N): y |
| 8. | Now run “fdisk -l /dev/sda” just to check everything went ok:
root@debian:~# fdisk -l /dev/sda

Disk /dev/sda: 2.7 TiB, 3000592982016 bytes, 5860533168 sectors
Units: sectors of 1 * 512 = 512 bytes
Sector size (logical/physical): 512 bytes / 4096 bytes
I/O size (minimum/optimal): 4096 bytes / 4096 bytes
So no partitions showing. |
| 9. | Now you can install mdadm
apt-get install mdadm rsync initramfs-tools During the install you will be asked the question “MD arrays needed for the root file system”. You need to enter “none” ! As has been mentioned before, ensure the window for the terminal is not too small otherwise when you are asked the question about “MD arrays needed for the root file system” you will only see:
If you see the above, simply kill the terminal session and start again with a bigger window and you will now see:
|
| 10. | Now create the array by running:
mdadm --create /dev/md0 --level=1 --raid-devices=2 missing /dev/sda --name=nas2:Mirror --force This will look like: root@debian:~# mdadm --create /dev/md0 --level=1 --raid-devices=2 missing /dev/sda --name=nas2:Mirror --force mdadm: Note: this array has metadata at the start and may not be suitable as a boot device. If you plan to store '/boot' on this device please ensure that your boot-loader understands md/v1.x metadata, or use --metadata=0.90 Continue creating array? y mdadm: Defaulting to version 1.2 metadata mdadm: array /dev/md0 started. Clearly the parameter “–name” is the name of the array. I would suggest you name it “<OMV hostname>:<raid name>” to fit in with what would be created if you had done it through OMV. So clearly in my case the hostname for the OMV server is “nas2”. Obviously you need to watch the “/dev/sda” matches your disk. |
| 11. | Now that the RAID array has been created you should add a file system so run “mkfs.ext4 -L Data /dev/md0”. The “-L” parameter is the name/label for the file system, in my case “Data”. Also the “/dev/md0” must clearly match the details you entered when creating the array.
root@debian:~# mkfs.ext4 -L Data /dev/md0 mke2fs 1.42.12 (29-Aug-2014) /dev/md0 contains a ext4 file system labelled 'Data2' last mounted on Mon Jul 11 08:46:39 2016 Proceed anyway? (y,n) y Creating filesystem with 732533872 4k blocks and 183140352 inodes Filesystem UUID: f20b47a4-d207-40aa-a7e6-42ea82354455 Superblock backups stored on blocks: 32768, 98304, 163840, 229376, 294912, 819200, 884736, 1605632, 2654208, 4096000, 7962624, 11239424, 20480000, 23887872, 71663616, 78675968, 102400000, 214990848, 512000000, 550731776, 644972544 Allocating group tables: done Writing inode tables: done Creating journal (32768 blocks): done Writing superblocks and filesystem accounting information: done |
| 12. | Shutdown the Deblian live and connect your disks back and boot into OMV |
| 13. | Now when you boot into OMV if you select “Storage | File Systems” you will see your new file system, we called “Data”, but it won’t be mounted:
You should select the “Data” file system and click on mount. After you have done that you will get the “The configuration has changed message…” and you should click on “Apply”. |
| 14. | From your terminal session you should add the array to the mdadm.conf:
mdadm --detail --scan >> /etc/mdadm/mdadm.conf |

You should now be in a position to create shares and so on.
Resources
Setting up RAID on an existing Debian/Ubuntu installation
https://feeding.cloud.geek.nz/posts/setting-up-raid-on-existing/
Mdadm Cheat Sheet