Backing up OMV can be a challenge as it doesn’t have any backup functionality. While there are solutions like Clonezilla and rsync the simplest is “dd” or “dcfldd”. You should read the article Installing Open Media Vault which explains how I suggest you do it so you don’t have to backup a 250GB hard drive.
This post describes backing up and restoring in a scenario where OMV is installed to a very small, 7GB, portion of the system disk. Again the article Installing Open Media Vault describes this approach in more detail
Before you start
Before you do anything I would suggest you remove any drives you don’t need. So if restoring from RAID then obviously you need the RAID disks. But if you are restoring from a network share then all you need is the system disk connected. It’s just about being extra careful that you don’t accidentally wipe over the wrong thing.
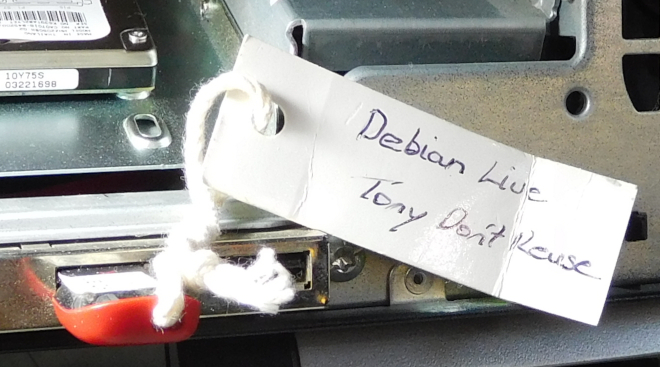
For this exercise we will boot from a Debian USB so follow the instructions in the post Create a Debian Live USB flash drive
We are going to use “dcfldd” so you should install it:
apt-get install dcfldd
Note the above might appear to hang on “processing triggers for man-db”, just be patient it might take a minute or so.
Wipe the disk first
Sometimes its a good idea to wipe out the new disk first, if you want to do this follow the instructions in the post Wipe a RAID disk.
First work out which disk needs to be wiped by running “lsblk”:
root@debian:~# lsblk
NAME   MAJ:MIN RM  SIZE RO TYPE MOUNTPOINT
sda      8:0    1  7.5G  0 disk
└─sda1   8:1    1  1.2G  0 part /lib/live/mount/medium
sdb      8:16   0 55.9G  0 disk
├─sdb1   8:17   0 53.6G  0 part
├─sdb2   8:18   0    1K  0 part
└─sdb5   8:21   0  2.3G  0 part
loop0    7:0    0  1.1G  1 loop /lib/live/mount/rootfs/filesystem.squashfs
From the above you can see sda is the Debian Live USB key and loop is part of this.
Thus we can see that sdb with 3 partitions is the system drive. If you want to zero the entire drive drive as well to reduce your backup sizes then run the following:
dcfldd if=/dev/zero of=/dev/sdb
Giving you something like:
root@debian:~# dcfldd if=/dev/zero of=/dev/sdb
47616 blocks (1488Mb) written.
And results in
root@debian:~# dcfldd if=/dev/zero of=/dev/sdb
2441984 blocks (76312Mb) written.
2442211+0 records in
2442210+0 records out
If you wanted to zero a smaller section of the disk you would run something like:
dcfldd if=/dev/zero of=/dev/sdb bs=512 count=15682111
This will zero 15682111 sectors each sector being 512 bytes
Mount the restore location
Now make the image restore/backup accessible.
Backup to a shared network drive
If the backup image is on a shared network drive then map this to a mount point:
mkdir /nas1
mount -t cifs -o username=joe,password=joesPassword //192.168.202.44/sata1 /nas1
cd /nas1
If you get an error “Host is down” you might need to add “vers=1.0” or similar. This would give:
mount -t cifs -o vers=1.0,username=joe,password=joesPassword //192.168.202.44/sata1 /nas1
Backup to a local RAID array
If the backup image is on the RAID drive for OMV then you need to first install the mdadm packages:
apt-get install mdadm rsync initramfs-tools
During the install it will ask about “Configuring mdadm” and will ask about “MD arrays needed for the root file system”. You need to enter “none” as your answer and click <enter>.
There is another issue at this point and that is if the terminal window, Putty say, is too small then all you see will be: If you see this then close your terminal/Putty session and start again – using <ctrl>C doesn’t work. You should instead see:
So at this stage enter “none” and press <enter> to continue.
Now run “lsblk” to see what filesystems and RAID arrays exist on your system:
root@debian:~# lsblk
NAME    MAJ:MIN RM  SIZE RO TYPE  MOUNTPOINT
sda       8:0    0 74.5G  0 disk
├─sda1    8:1    0  9.6G  0 part
├─sda2    8:2    0    1K  0 part
└─sda5    8:5    0  466M  0 part
sdb       8:16   0 74.5G  0 disk
└─md127   9:127  0 74.5G  0 raid1
sdc       8:32   0 74.5G  0 disk
└─md127   9:127  0 74.5G  0 raid1
sdd       8:48   1  7.5G  0 disk
└─sdd1    8:49   1  1.2G  0 part  /lib/live/mount/medium
loop0     7:0    0  1.1G  1 loop  /lib/live/mount/rootfs/filesystem.squashfs
From the above you can see the array is “md127” so create a mount point and mount the array:
mkdir /raid
mount /dev/md127 /raid
Doing a backup
For this example we will backup to a local RAID array.
Lets look at lsblk again:
root@debian:/# lsblk
NAME    MAJ:MIN RM  SIZE RO TYPE  MOUNTPOINT
sda       8:0    0 74.5G  0 disk
├─sda1    8:1    0  6.7G  0 part
├─sda2    8:2    0    1K  0 part
└─sda5    8:5    0  341M  0 part
sdb       8:16   0 74.5G  0 disk
└─md127   9:127  0 74.5G  0 raid1 /raid
sdc       8:32   1  7.5G  0 disk
└─sdc1    8:33   1  1.2G  0 part  /lib/live/mount/medium
loop0     7:0    0  1.1G  1 loop  /lib/live/mount/rootfs/filesystem.squashfs
So from the above we can see that the system drive is sda. You can also look at the disk sizes as this may give you a clue. Lets look at sda and run fdisk:
root@debian:/# fdisk -l /dev/sda

Disk /dev/sda: 74.5 GiB, 80026361856 bytes, 156301488 sectors
Units: sectors of 1 * 512 = 512 bytes
Sector size (logical/physical): 512 bytes / 512 bytes
I/O size (minimum/optimal): 512 bytes / 512 bytes
Disklabel type: dos
Disk identifier: 0x00080b9b

Device     Boot    Start      End  Sectors  Size Id Type
/dev/sda1  *        2048 13977599 13975552  6.7G 83 Linux
/dev/sda2       13979646 14678015   698370  341M  5 Extended
/dev/sda5       13979648 14678015   698368  341M 82 Linux swap / Solaris
So you can see that the partitions which are actively used go from 0 to 14678015 sectors and the sectors are 512 bytes.
So I will suggest you copy an extra 4096 bytes, just to be safe 🙂 so in our case this is:
14678015 + 4096 = 14682111
So do a backup by running:
dcfldd bs=512 count=14682111 if=/dev/sda | gzip -c > /raid/backups/nas2_10-7-2016_512k-blocks.img.gz
Note you should set the block size, “bs=” in dcfldd to match what fdisk reports, in this case 512. At the end you should see:
root@debian:/raid#  dcfldd bs=512 count=14682111 if=/dev/sda | gzip -c > /raid/backups/nas2_10-7-2016_512k-blocks.img.gz
14681856 blocks (7168Mb) written.
14682111+0 records in
14682111+0 records out
For a 7GB disk this should take say 5 – 10 minutes but not hours!
Doing a restore
Lets look at lsblk again:
root@debian:/raid/backups# lsblk
NAME    MAJ:MIN RM  SIZE RO TYPE  MOUNTPOINT
sda       8:0    1  7.5G  0 disk
└─sda1    8:1    1  1.2G  0 part  /lib/live/mount/medium
sdb       8:16   0 55.9G  0 disk
sdc       8:32   0 74.5G  0 disk
└─md127   9:127  0 74.5G  0 raid1 /raid
loop0     7:0    0  1.1G  1 loop  /lib/live/mount/rootfs/filesystem.squashfs
So from the above we can see that the system drive is sdb because sda with the “/lib/live/mount”. is Debian Live and sdc is the RAID disk.
You can also look at the disk sizes as this may give you a clue.
First run “fdisk -l” against your disk to work out the block size:
root@debian:/raid/backups# fdisk -l /dev/sdb

Disk /dev/sdb: 55.9 GiB, 60011642880 bytes, 117210240 sectors
Units: sectors of 1 * 512 = 512 bytes
Sector size (logical/physical): 512 bytes / 512 bytes
I/O size (minimum/optimal): 512 bytes / 512 bytes
So from the above you can see that for “dev/sdb” the block size is 512
Start the restore by running something like:
gunzip -c /raid/backups/nas2_10-7-2016_512k-blocks.img.gz | dcfldd bs=512 of=/dev/sdb
This will return:
root@debian:/nas1# gunzip -c /nas1/omv2.1_vanilla_7gb-hdd_2-7-2016_512k-blocks.img.gz | dcfldd bs=512 of=/dev/sda
14680064 blocks (7168Mb) written.
14680064+0 records in
14680064+0 records out
So you can see the records count matches and all is good.