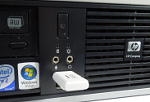
I have a couple of ESXi servers at home that I boot from USB keys – see the post Running ESXi 5.1 from a USB key. The problem is that using a USB imaging tool doesn’t seem to work. When I boot up ESX I get an error:
BANK5: invalid configuration.
BANK6: not a VMware boot bank
No hypervisor found
The problem would seem to be that the imaging tools are fine, its just that when you do this on a Windows platform and probably more specifically a Windows 7 or 10, then Windows messes around with the partition numbering or something.
So the solution, as much as it is a little painful, is to use Linux to do the restore.
Creating the backup image
I use the “USB Imaging Tool” by Alexander Beug http://www.alexpage.de/. Simply plug the ESXi key into your Windows PC run the tool and you see:
Note: Apparently a number of USB flash disk manufacturers are changing their disks to suit Windows ReadyBoost. This means they appear to the O/S as a USB hard drive rather than a flash disk. This means they do not show up in the USB Imaging Tool or some other similar applications.
Just click on “Backup” and save to a file.
Restoring a USB flash disk image
Restoring the image is the fun bit. It would appear that programs such as USB Image Tool probably work fine, but for some reason because it is running in Windows it appears that Windows does something to the partition numbering on the flash disk.
An ESXi USB flash disk’s partitions look like this in Windows disk management tool:

The result is that if you restore the image with the USB Image Tool and attempt to boot it you get:
BANK5: invalid configuration.
BANK6: not a VMware boot bank
No hypervisor found
There are many ways to work around this problem but I was looking for one that was “relatively easy” and worked for me. It may not be perfect for me but it was the best of an unfortunate set of choices.
| 1. | Boot a PC, any PC, with the Debian Live USB key – see the post Create a Debian Live USB flash drive for more details.
You can use an PC for this but given you will be wiping disks it may make sense to remove any other disks or use a PC which isn’t critical. |
| 2. | Do not insert the destination USB key just yet !! |
| 3. | Now run “lsblk” to see what disks and partitions you have:
root@debian:~# lsblk NAME MAJ:MIN RM SIZE RO TYPE MOUNTPOINT sda 8:0 0 74.5G 0 disk └─sda1 8:1 0 74.5G 0 part sdb 8:16 0 7.5G 0 disk └─sdb1 8:17 0 1.2G 0 part /lib/live/mount/medium sr0 11:0 1 1024M 0 rom loop0 7:0 0 1.1G 1 loop /lib/live/mount/rootfs/filesystem.squashfs |
| 4. | Now insert the destination USB key and run lsblk again:
root@debian:~# lsblk
NAME   MAJ:MIN RM  SIZE RO TYPE MOUNTPOINT
sda      8:0    0 74.5G  0 disk
└─sda1   8:1    0 74.5G  0 part
sdb      8:16   0  7.5G  0 disk
└─sdb1   8:17   0  1.2G  0 part /lib/live/mount/medium
sdc      8:32   1  7.5G  0 disk
└─sdc1   8:33   1  1.2G  0 part
sr0     11:0    1 1024M  0 rom
loop0    7:0    0  1.1G  1 loop /lib/live/mount/rootfs/filesystem.squashfs
You can see immediately which is the new disk by comparing the results of lsblk before and after inserting the key. |
| 5. | At this point you need to be able to access the backup image. In my case it was on a shared disk so I ran:
mkdir /nas2 mount -t cifs -o username=joeblogs,password=joespasswd //192.168.202.35/backups /nas2 |
| 6. | We now need to install “dcfldd” which is a slightly enhanced version of dd. What I like about it is that it gives you progress info while it copies.
Install it by running: apt-get install dcfldd |
| 7. | Now run fdisk against the destination flash disk to double check the sector
root@debian:/# fdisk -l /dev/sdc

Disk /dev/sdc: 7.5 GiB, 8004304896 bytes, 15633408 sectors
Units: sectors of 1 * 512 = 512 bytes
Sector size (logical/physical): 512 bytes / 512 bytes
I/O size (minimum/optimal): 512 bytes / 512 bytes
Disklabel type: dos
Disk identifier: 0x06760b31

Device     Boot Start     End Sectors  Size Id Type
/dev/sdc1  *       64 2573503 2573440  1.2G 17 Hidden HPFS/NTFS
So you can see the sector size is 512 bytes |
| 8. | Now run dcfldd:
dcfldd bs=512 if="/nas2/esxi/ESXA/ESXA USB Key 16-7-2016 V2.img" of=/dev/sdc So in the above you can see the image file is located at: Image file: /nas2/esxi/ESXA/ESXA USB Key 16-7-2016 V2.img The result will be similar to: root@debian:/# dcfldd bs=512 if="/nas2/esxi/ESXA/ESXA USB Key 16-7-2016 V2.img" of=/dev/sdc 15633408 blocks (7633Mb) written. 15633408+0 records in 15633408+0 records out |